Tomy Timers
The idea of using the mechanical gear in little plastic toys (the first one used was probably called "Tomy" - from there on we all talk from Tomy timers only) as a timer to control the deployment of the parachute for a water rocket comes from Bruce Berggren (here). At least that is where I saw it first.
Where to get them
Construction of the Tomy Timer Assembly
Operation of the Tomy Timer Assembly
Adjustment of Tomy Timers
Where to get them
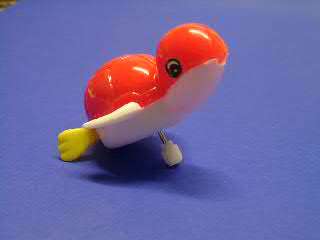
It took me a long time and many visits to all kind of toy shops to find them. To spare others (especially the Germans) unnecessary search time I have set up some pictures of toys that contain the famous timers:
 |
This one was the first I got a hold of; |
 |
This one below is a swimming toy |
 |
This one has a much better timer built in. |
Construction of the Tomy Timer Assembly
- Carefully disassemble the toy. What we want is the part with gears in it and a metal shaft with the white handle sticking out.
- Somebody wrote on his site to cut off all (plastic) shafts except the metal one. My advice is not to do so. I use one of the plastic shafts with an excenter for blocking the gear before launch.
- Rip off the white handle.
- Shorten the metal shaft.
- Glue the white handle back on the metal shaft.
- Mark the 12 o'clock position on the handle. This is helpful for the adjustments.
- Drill a hole into the white handle crossways to the shaft.
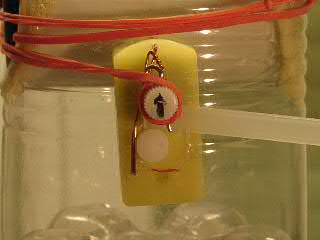
- From a paper clip, make a pin 1.3 times as long as the diameter of the white handle with a loop on one side. Attach one side of a rubber band to the loop, the other side to some hook on the rocket body.
- Take a flat piece of cable tie, drill a hole in it, attach a string in it. This is the trigger.
- Fasten the timer to your rocket. I used the existing holes in the timer and a piece of copper wire.
 |
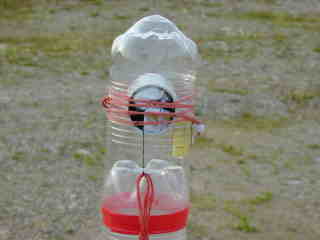
By now, you should have something like this. |
Operation of the Tomy Timer Assembly
- First of all, determine with some kind of Water rocket simulator the time that your rocket will need to reach its apogee.
- Find something to jam the gears of the timer. I use the piece of cable tie (9. above) and jam it between the metal shaft and the plastic excenter shaft of the timer. The string is attached to the launcher.
- Wind up the timer spring by turning the handle (how often? see below)
- Stuff the parachute into the pvc pipe in the rocket.
- Wind the rubber band with the paper clip pin around the rocket on top of the pvc pipe opening, holding the chute inside the pipe.
- Put the metal pin into the hole (7. above) (how many twinings? see below).
- Before you launch, you better check your adjustments by pulling the Tomy trigger and measuring the time until deployment occurs. If it does not match your simulated apogee time, change your adjustments, beginning with step 2.
- If the measured time matches (or is slightly larger than) your simulated apogee time, you repeat the last used adjustments exactly as before.
- Make sure the trigger string is securely connected to the launcher.
- Launch and enjoy!
 |
Parachute assembly, on top of the rocket, ready for launch. |
Adjustment of Tomy Timers
In this section I have set up some settings with the Tomy Timer from the walking witch toy. In long time intervals between launch days, I kept forgetting how to set it up. So I had to write it down somewhere, why not here?
turns on handle |
rubber band twining (°) |
duration (sec) |
|
 |
1.5 |
180 |
2.7 |
 |
1.75 |
270 |
3.7 |
 |
2 |
360 |
4.6 |
 |
2.25 |
360 + 90 |
5.7 |
 |
2.375 |
360 + 135 |
6.2 |
| no picture | 2 |
360 + 180 |
7.7 (*) |
 |
2.25 |
360 + 270 |
NO DEPLOYMENT! (*) |
 |
2 |
2 * 360 |
NO DEPLOYMENT!
The metal pin (*) |
 |
This is how it ends
up, if the rubber band is not tightened enough after twining the band around the timer handle. |
(*):
NO
DAMAGE TO THE |
to the Horizontal chute deployment page
![]()


